Coding N Concepts
 How to generate Curl Command from Postman
In this tutorial, we’ll learn how to generate Curl command using Postman.
Overview
Many times we need to execute GET, POST, PUT, PATCH, DELETE HTTP requests to verify endpoints. Normally we use:
- Browser to execute GET request
- Postman to execute GET, POST, PUT, PATCH, DELETE requests
There are many times when we are stuck in a situation where:
- Browser is not available on the machine
- Postman is not able to install on a certain machine
- Using Linux environment
In such cases, Curl command is very useful and can be used to execute HTTP endpoints from a command prompt or terminal.
Installing Curl
The curl package is pre-installed on most Linux distributions today.
If curl is not installed you can easily install it using the package manager of your distribution.
Install Curl on Ubuntu and Debian
sudo apt update
sudo apt install curl
Install Curl on CentOS and Fedora
sudo yum install curl
Generate Curl from Postman
Considering that you are already familiar with Postman. Follow these steps:
-
Create an HTTP request using Postman
-
Click on the code </> icon from the menu on the right.
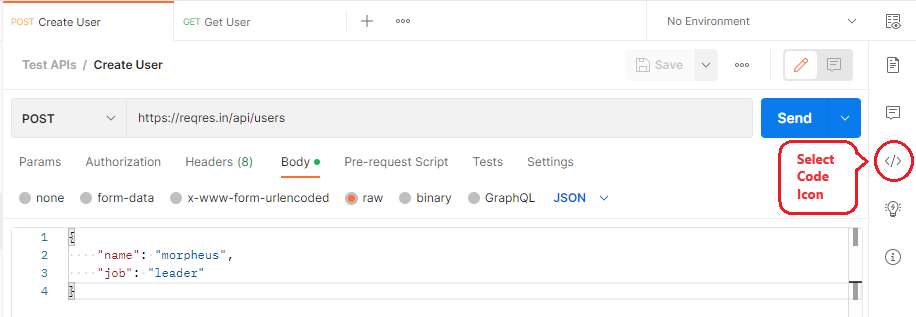
codeicon or text button somewhere else depending on the Postman version. -
A dialog “Code Snippet” will appear. Select “cURL” from the dropdown and copy the generated command code snippet.
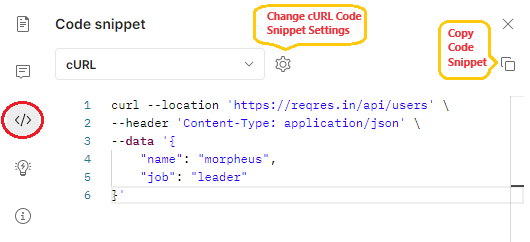
curl 'https://reqres.in/api/users' \ --header 'Content-Type: application/json' \ --data '{ "name": "morpheus", "job": "leader" }' -
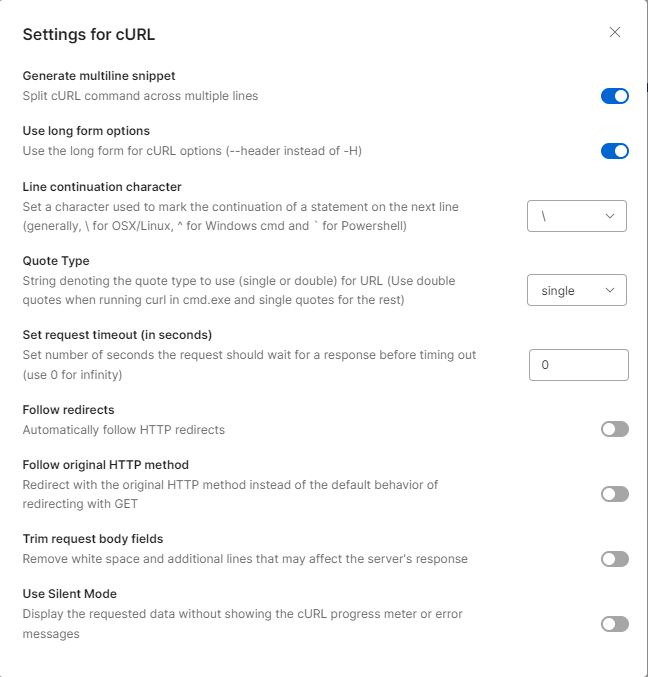
Postman generates multi-line cURL code snippets by default. Mac and Linux support multi-line cURL code snippets but not Windows.
You can change the default behavior by changing the settings using the icon next to the dropdown.