Coding N Concepts
 How to configure Swagger in spring boot
Swagger library is useful if you are creating REST services in spring boot web application. Swagger user interface allows you to view REST services and execute GET, POST, PUT, DELETE HTTP endpoints. This is helpful since you do not need to use Postman or some other tool to test REST Apis.
Follow these steps to configure swagger in your spring boot application:-
Add Maven Dependencies
If you are using maven, then add following swagger dependencies in your pom.xml
pom.xml
<properties>
  	<swagger.version>2.9.2</swagger.version>
</properties>
<dependencies>
	<!-- swagger for api documentation and rest client generation -->
	<dependency>
		<groupId>io.springfox</groupId>
		<artifactId>springfox-swagger2</artifactId>
		<version>${swagger.version}</version>
	</dependency>
	<!-- swagger-ui for api documentation web ui -->
	<dependency>
		<groupId>io.springfox</groupId>
		<artifactId>springfox-swagger-ui</artifactId>
		<version>${swagger.version}</version>
	</dependency>
	<dependency>
		<groupId>io.springfox</groupId>
		<artifactId>springfox-data-rest</artifactId>
		<version>${swagger.version}</version>
	</dependency>
</dependencies>
Define Configuration Properties
Instead of hard coding values in swagger configuration we are going to define properties in configuration file. We’re using application.yml to define properties. You may also use application.properties file.
application.yml
app:
  name: spring boot application
  api:
    title: Spring Boot APIs
    version: 1.0.0
    description: Spring Boot APIs description
    base-package: com.abc.controller
    contact-name: apisupportgroup
    contact-email: apisupportgroup@abc.com
    swagger:
      enable: true
Note that we’ve added a property app.api.swagger.enable to enable or disable swagger from our Sprint boot project.
Let’s use all these properties and define our SwaggerConfig class file.
Define SwaggerConfig.java
Let’s create SwaggerConfig class to configure Swagger in our Spring boot project.
 1@Configuration
 2@EnableSwagger2
 3@ConfigurationProperties("app.api")
 4@ConditionalOnProperty(name="app.api.swagger.enable", havingValue = "true", matchIfMissing = false)
 5public class SwaggerConfig {
 6
 7	private String version;
 8	private String title;
 9	private String description;
10	private String basePackage;
11	private String contactName;
12	private String contactEmail;
13
14	@Bean
15	public Docket api() {
16		return new Docket(DocumentationType.SWAGGER_2)
17			.select()
18			.apis(RequestHandlerSelectors.basePackage(basePackage))
19			.paths(PathSelectors.any())
20			.build()
21			.directModelSubstitute(LocalDate.class, java.sql.Date.class)
22			.directModelSubstitute(LocalDateTime.class, java.util.Date.class)
23			.apiInfo(apiInfo());
24	}
25
26	private ApiInfo apiInfo() {
27		return new ApiInfoBuilder()
28			.title(title)
29			.description(description)
30			.version(version)
31			.contact(new Contact(contactName, null, contactEmail))
32			.build();
33	}
34
35	/**
36		...
37		...
38		Getters
39		Setters
40		...
41		...
42	**/
43}
Note some important points of our SwaggerConfig class file:
@Configurationannotation is used to auto scan this class file.@EnableSwagger2annotation is used to help Spring boot project to add necessary dependency for Swagger@ConfigurationPropertiesannotation is used to read properties from application.yml and initialize fields@ConditionalOnPropertyannotation is used to initializeSwaggerConfigbean based onapp.api.swagger.enableproperty flag.- Line 21, 22 is correct way in swagger to map “Date” and “DateTime” to their corresponding swagger types:
- Substitute “Date” types (java.util.LocalDate, org.joda.time.LocalDate) by java.sql.Date.
- Substitute “DateTime” types (java.util.ZonedDateTime, org.joda.time.LocalDateTime, …) by java.util.Date.
Verify Swagger
That’s it. Now define some controllers to expose REST api endpoints and start your spring boot application. You will be able to see swagger UI something like this:-
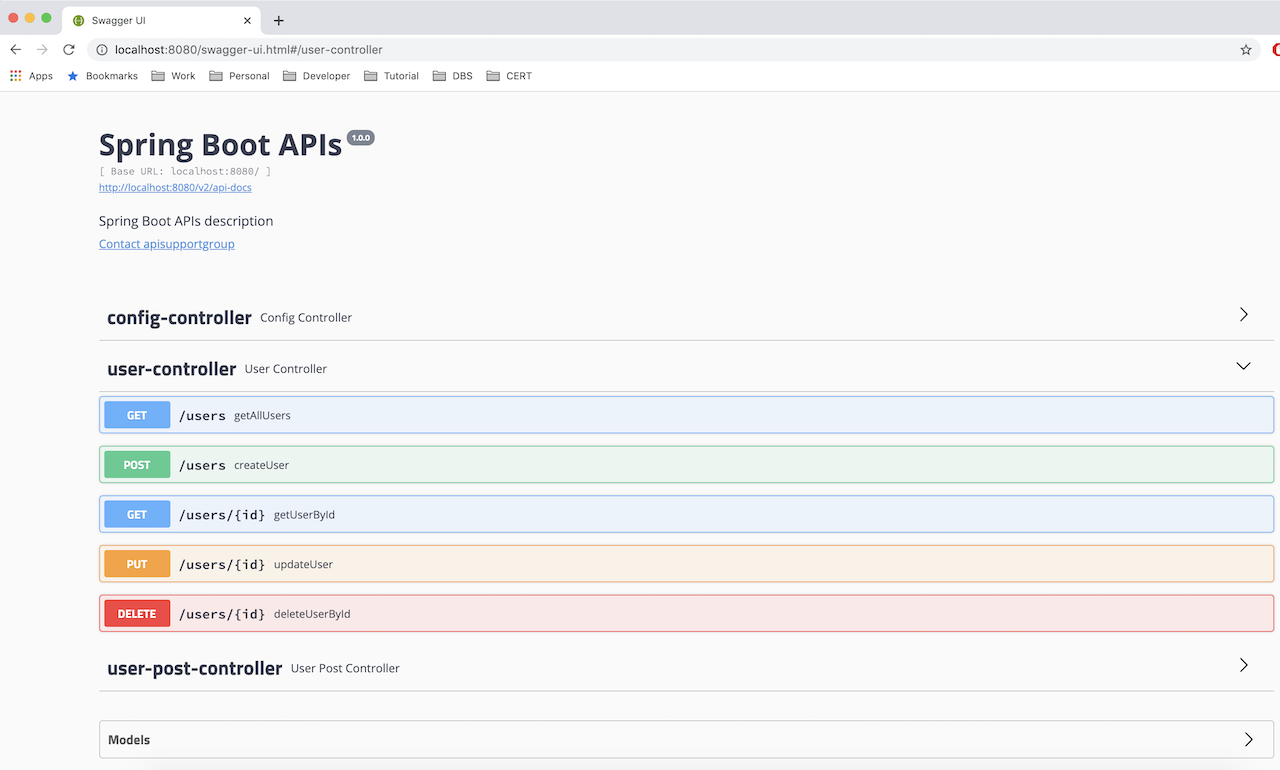
URL for Swagger API User Interface
http://localhost:8080/swagger-ui.html
URL for Swagger API Docs Json
http://localhost:8080/v2/api-docs
Turn off Swagger in Production
Swagger user interface is very convenient for development purpose. However we generally turn off the Swagger in production environment due to security concerns.
You can disable the Swagger in production if you are using the same SwaggerConfig class file from previous step.
- Disable from the property file if you have environment specific property file
application-prod.properties
app.api.swagger.enable = false
application-prod.yml
app:
  api:
    swagger:
      enable: false
- You can also disable from the command-line parameter
command-line parameter
$ java -jar -Dapp.api.swagger.enable=false spring-boot-app-1.0.jar
OR
$ java -jar spring-boot-app-1.0.jar --app.api.swagger.enable=false
Hide Endpoints from Swagger Documentation
While creating Swagger documentation, we often need to hide endpoints from being exposed to end-users. The most common scenario to do so is when an endpoint is not ready yet. Also, we could have some private endpoints which we don’t want to expose.
We can hide such endpoints from Swagger Docs by annotating controller class or its method with @ApiIgnore annotation.
Hide Specific Endpoint
If you want to hide specific endpoint of a controller class, apply the @ApiIgnore annotation at method level.
@RestController
public class UserController {

	@ApiIgnore
	@GetMapping("/getUser")
	public String getUser() {
		return "Ashish Lahoti";
	}
}
Hide All Endpoints
If you want to hide all endpoints of a controller class, apply the @ApiIgnore annotation at class level.
@ApiIgnore
@RestController
public class UserController {
    // regular code
}
Generate REST Client with Swagger Codegen
Swagger provides a swagger-codegen-cli utility jar that allows us to generate REST clients for various programming languages and multiple frameworks.
Download Jar file
Download the latest swagger-codegen-cli.jar from here
Generate REST Client
Let’s generate our REST client by executing the command from command-line:
java -jar swagger-codegen-cli.jar generate \
  -i http://localhost:8080/v2/api-docs \
  --api-package com.example.client.api \
  --model-package com.example.client.model \
  --invoker-package com.example.client.invoker \
  --group-id com.example \
  --artifact-id spring-swagger-codegen-api-client \
  --artifact-version 0.0.1-SNAPSHOT \
  -l java \
  -o spring-swagger-codegen-api-client
The provided arguments consist of:
- -i is source swagger file URL or path
- –api-package, –model-package, –invoker-package are package names for generated classes
- –group-id, –artifact-id, –artifact-version are Maven project properties for generated client project
- -l is the programming language of the generated client
- -o is the output directory name
To list all Java-related options, type the following command:
java -jar swagger-codegen-cli.jar config-help -l java
Download the complete source code from github